Desserts
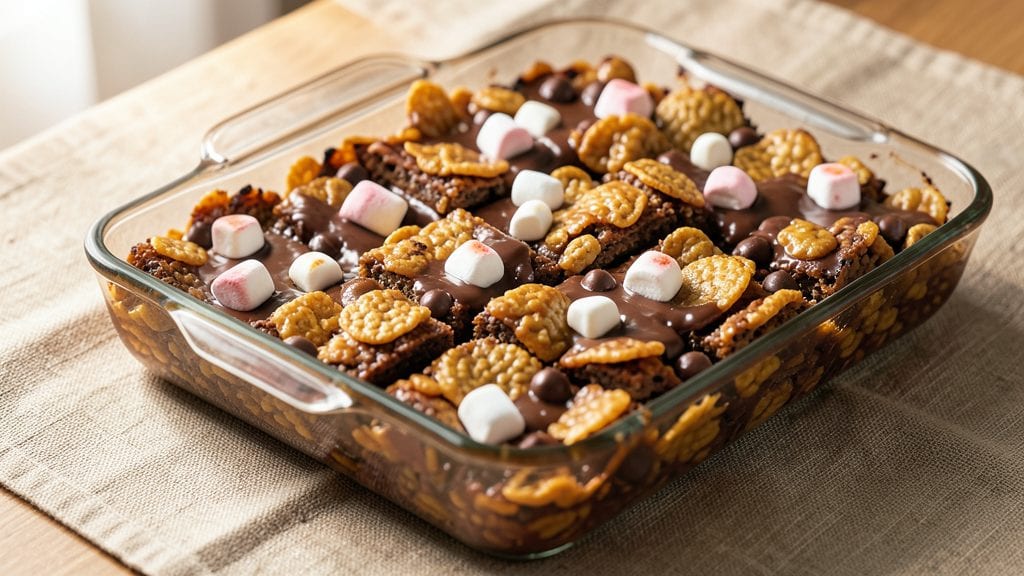
This chocolate Rice Krispie squares recipe delivers the perfect balance of crispy cereal and melty fudgy layers—no oven required. 💛 The secret lies in melting butter and chocolate together just right, then folding in marshmallows until they reach that ideal, stretchy consistency.
I’ve made these dozens of times, and this version consistently delivers restaurant-quality results with minimal effort.
The beauty of this dessert is its simplicity—just five key ingredients come together in minutes, yet the texture is anything but basic. The Rice Krispies provide that satisfying crunch, while the marshmallow-chocolate mixture creates pockets of gooey goodness in every bite.
Chilling the pan ensures clean cuts and even texture, so you’ll end up with perfectly square pieces that hold their shape.
What you’ll love most is how customizable this recipe is. Add chopped nuts for extra crunch, mix in sprinkles for a festive touch, or drizzle with ganache for a gourmet upgrade.
These squares stay fresh for days, making them ideal for parties, potlucks, or satisfying a late-night sweet tooth. The best part? No baking required—just melt, mix, press, and chill.
Perfect for beginners and experienced bakers alike, this recipe is a foolproof way to create a crowd-pleasing dessert that feels indulgent but takes less than 20 minutes to prepare. Let’s get started—your taste buds will thank you!
Ingredients for chocolate rice krispie squares
Five ingredients, zero oven, maximum satisfaction—this is your no-fail chocolate Rice Krispie squares shortcut!
| Ingredient | Amount | Notes |
|---|---|---|
| Unsalted Butter 🧈 | ½ cup | Cut into small cubes for even melting |
| Semi-Sweet Chocolate Chips 🍫 | 1 ½ cups | High-quality chips for rich flavor |
| Mini Marshmallows 🍡 | 4 cups | Regular marshmallows work too |
| Rice Krispies Cereal 🍪 | 6 cups | Original flavor preferred |
| Vanilla Extract 🌸 | 1 tsp | Pure extract for best flavor |
The butter and chocolate are your flavor foundation—don’t skimp here! Use European-style butter like Plugrá if you can find it, or at least Land O’Lakes unsalted from the grocery store. For chocolate, Ghirardelli or Nestlé chips melt smoothly and taste luxurious. Pro tip: chop the butter into tiny cubes so it melts faster and more evenly. The marshmallows? Kraft mini marshmallows are the gold standard, but store-brand works too. Just make sure they're fresh—no hard, yellowed ones!
No vanilla extract? A splash of milk or a pinch of vanilla sugar will work in a pinch. Running out of Rice Krispies? Crushed graham crackers or cornflakes add a different but still delicious crunch. Want extra richness? Swap half the marshmallows for white chocolate chips. The key to perfect texture is melting the butter and chocolate together until completely smooth—no lumps!—then folding in marshmallows until they're just starting to melt but still hold their shape. If your mixture gets too thick, add a few extra marshmallows to loosen it up.
These stay fresh for up to 5 days in an airtight container at room temperature, or 2 weeks in the fridge. For parties, cut into smaller squares—they disappear fast! Store leftovers in the freezer for up to 3 months if you're prepping ahead. The best part? They taste even better the next day as the flavors meld. Double the recipe—you won't regret it!
Why You'll Love This Recipe
- Here’s what sold me: that perfect contrast of buttery Rice Krispies with gooey marshmallow pockets, all wrapped in rich chocolate. The vanilla extract ties it together so smoothly, it’s like someone took all the best parts of a s’more and turned them into a handheld treat.
- I’ll be real: this recipe costs me less than $5 to make enough for a dozen servings. You’re using pantry staples, minimal ingredients, and no one will guess how affordable it was. Plus, leftovers? They disappear faster than I can say “second helping.”
Step-by-step instructions for chocolate Rice Krispie squares
Get ready to create the ultimate treat—rich chocolate layers and crispy cereal in one perfect bite!
🔥 Step 1: Melt Butter and Chocolate Together
In a large saucepan over medium heat, melt the 0.5 cup unsalted butter cut into small cubes. Once it's fully melted and starting to bubble gently, reduce heat to low and add the 1.5 cups semi-sweet chocolate chips. Stir constantly until the chocolate is completely melted and the mixture is smooth—this should take about 3-4 minutes.
Here's where the magic begins: remove the pan from heat and stir in the 1 tsp vanilla extract. The mixture should look glossy and rich. If you see any unmelted chocolate, return the pan to low heat for just 10 seconds to finish melting—just don't let it boil or it'll seize up. This step creates the luscious chocolate layer that makes these squares irresistible!
🍳 Step 2: Add Marshmallows and Mix Until Silky
Return the pan to medium-low heat and slowly add the 4 cups mini marshmallows, stirring constantly. Watch closely—the mixture will foam up dramatically as the marshmallows melt. Keep stirring until all the marshmallows are completely dissolved and the mixture becomes thick and glossy, about 5-6 minutes.
I know it seems like too much, but trust me—this is exactly what we want for that perfect fudgy texture. If the mixture starts to look grainy, it's ready. Remove from heat immediately to prevent overcooking, which would make the chocolate turn grainy. This is the moment that matters: smooth, melted, and ready to combine with the cereal!
🥘 Step 3: Combine with Rice Krispies Cereal
Quickly transfer the melted chocolate mixture to a large mixing bowl. Using a wooden spoon or rubber spatula, gently fold in the 6 cups rice krispies cereal until every piece is coated. Work fast but carefully—you want to distribute the cereal evenly without crushing it. The mixture will look dry at first, but as you mix, the cereal will absorb the chocolate and become uniformly coated.
Don't worry if it looks like too much cereal—this is a classic ratio that guarantees perfect texture. The cereal should be completely coated, with no dry spots remaining. If you're making these for kids or a crowd, this is the perfect time to let them help with mixing (just supervise closely with the hot bowl!).
🔪 Step 4: Press into Pan for Perfect Squares
Lightly grease an 8x8-inch baking dish with butter or line it with parchment paper for easy removal. Transfer the cereal mixture to the prepared pan and press down firmly and evenly using a spatula or the back of a spoon. You want the top to be smooth and compact—this ensures clean slices later. Press down gently but firmly until the cereal is tightly packed.
Here's the thing—if you're impatient and try to rush this step, you'll end up with uneven squares that crumble when cutting. Take your time to create an even layer. For extra crispy edges, you can press the mixture against the sides of the pan as well. Once pressed, let the mixture sit for 10 minutes at room temperature to firm up slightly before cutting.
⏰ Step 5: Chill and Cut into Perfect Squares
Refrigerate the pan for at least 1 hour (or up to 24 hours) to let the chocolate harden completely. This chilling step is crucial—it allows the chocolate to set properly so you get clean slices. If you're in a hurry, you can pop the pan in the freezer for 20-30 minutes, but room temperature chilling gives the best texture.
Once chilled, remove the pan from the refrigerator and let it sit at room temperature for just 5 minutes to make it easier to cut. Using a sharp knife, cut the mixture into 16 equal squares (4 rows of 4). For perfectly clean cuts, dip your knife in hot water, wipe it dry, and press straight down through the mixture. Each square should have that beautiful contrast of crispy cereal and gooey chocolate!
Pro Tips For Making Chocolate Rice Krispie Squares
- MELT CHOCOLATE SLOW: I used to dump chocolate chips into butter and stir like a maniac—only to end up with clumps. Instead, lower the heat to medium-low, spread the chips evenly, and let them melt gently while stirring occasionally. The butter won’t burn, and the chocolate won’t seize.
- TOAST MARSHMALLOWS FIRST: Skip the "add them last" rule—toss the mini marshmallows in a dry pan over medium heat for 30 seconds until they start puffing. They’ll stay fluffier in the squares and resist that sad, sticky collapse.
- WEIGH THE KRISPIES: That "one cup" of Rice Krispies? It’s not the same across brands. Weigh them (about 30g per cup) for consistency—especially if you’re doubling the recipe. Trust me, the texture changes when you eyeball it.
- COOL IT FASTER: Line your pan with parchment before pouring the mix, then chill the whole thing in the fridge for 10 minutes. Cutting warm squares means mushy edges—this guarantees clean breaks and crispy layers. (Yes, even if you’re impatient like me.)
Essential equipment for great chocolate rice krispie squares
Essential Mixing Tools
First up, you’ll need a large mixing bowl—I recommend a stainless steel or glass bowl (like the Pyrex 5-quart or OXO Good Grips) for even mixing. The bowl should be big enough to hold all your ingredients without overflowing.
A wooden spoon or rubber spatula (like the OXO Good Grips silicone spatula) is perfect for folding in the Rice Krispies—they won’t scratch your pan and help distribute the cereal evenly. 🍳
Heat Control Gear
For melting the butter and chocolate, a medium-sized saucepan (I use a Calphalon stainless steel) is ideal—it gives enough surface area for even heating. A heat-resistant silicone spatula (like EcoTools) helps scrape every last bit of melted chocolate from the sides.
And don’t forget a small bowl for mixing in the vanilla extract while the pan is off the heat. Pro tip: Use a candy thermometer (like the Thermoworks Thermapen) to monitor the butter-chocolate mixture—it should reach 110-115°F for perfect smoothness.
Pan and Pressing Tools
An 8x8-inch baking dish is your best friend here—opt for a lightweight aluminum pan (like Wilton) for easy handling, or a glass pan (like CorningWare) if you prefer stovetop-safe options. Line it with parchment paper for foolproof removal, or grease it lightly with butter.
For pressing the mixture, a small offset spatula (like West Bend) or even the back of a butter knife works perfectly. If you’re making a big batch, a rolling pin helps create an ultra-smooth, even surface. 🔪
Cutting and Serving
To cut clean squares, grab a sharp chef’s knife (I love the Mercer Culinary Genesis) and a small bowl of hot water for dipping—this keeps the knife from dragging and ensures straight cuts.
For serving, wooden skewers or plastic squares (like Wilton disposable cake carriers) work great for parties. If you’re prepping ahead, store leftovers in an airtight container (like Rubbermaid Brilliance) to maintain freshness. 💫
Optional Upgrades
Want to take these to the next level? A mini food processor (like Cuisinart Mini-Prep) can help crush nuts or sprinkles into the cereal for extra texture. For a gourmet touch, a drizzling bottle (like Wilton squeeze bottle) lets you add melted chocolate or caramel swirls after cutting.
And if you’re making these often, a digital kitchen scale (like OXO Good Grips) ensures precise measurements for consistent results every time.
Nutrition facts
Frequently asked questions
Can I make these without marshmallows?
While marshmallows create that classic gooey texture, you can substitute them with 1 cup of melted white chocolate or 1/2 cup of peanut butter for a different flavor profile. The key is maintaining the same ratio of binding ingredients to cereal—just adjust the wet component to match the marshmallow quantity.
Why did my squares turn out too crumbly?
Crumbly squares usually mean the chocolate didn't set properly. Make sure you chilled them for the full 1 hour (or at least 20 minutes in the freezer). Also, pressing the mixture firmly into the pan ensures better cohesion. If it still crumbles, try adding 1 extra tablespoon of melted butter to the chocolate mixture next time.
How can I make these vegan?
Swap the butter for vegan butter or coconut oil, use vegan chocolate chips and marshmallows, and add 1 tablespoon of maple syrup to help bind the mixture. The texture will be slightly softer but still delicious. For extra crunch, toast the Rice Krispies in the oven for 5 minutes before mixing.
Can I add nuts or sprinkles?
Fold in 1 cup of chopped nuts (pecans, almonds, or walnuts) or 1/2 cup of colorful sprinkles when mixing with the cereal. For even distribution, pulse the nuts in a food processor first. Pro tip: Press the nut-sprinkle mixture into the pan in layers if you want a marbled effect.
How do I store these for parties?
Keep them in an airtight container at room temperature for up to 5 days, or refrigerate for 2 weeks. For parties, cut into smaller squares (like 24 pieces) so they disappear faster. Wrap individual pieces in parchment paper for easy grab-and-go serving. Freezing isn't recommended as it makes the cereal soggy.