
Desserts
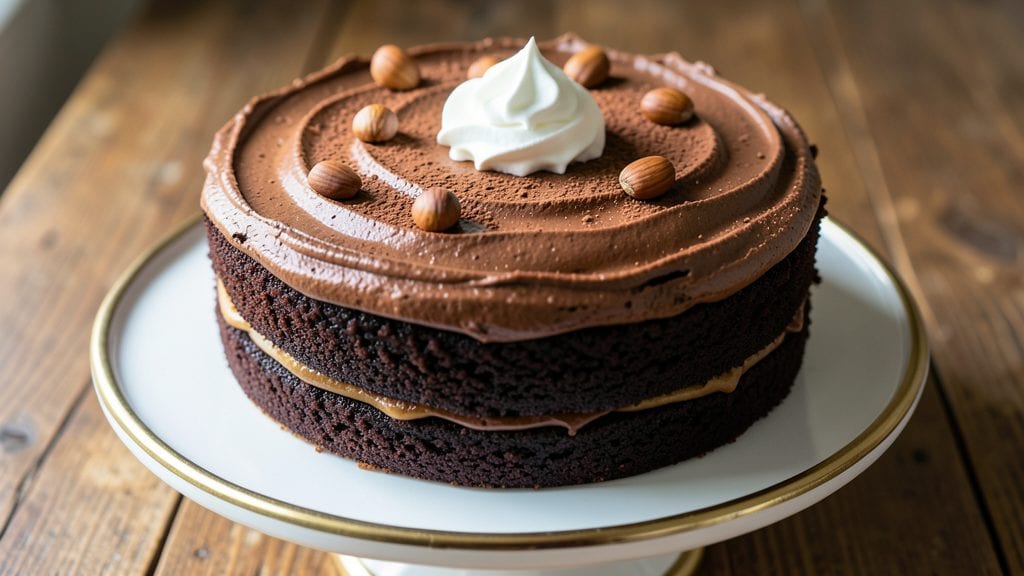
This old-fashioned chocolate cake recipe delivers the kind of rich, moist layers that evoke childhood memories of grandma’s kitchen. ✨ The secret lies in precise measurements and a warm spiced crunch that sets it apart from modern versions—no shortcuts, just time-tested tradition with foolproof results.
What makes this recipe stand out is its balanced texture: tender, fudgy centers with just enough crumb to hold the layers together. The warm spices—cinnamon and nutmeg—add depth without overpowering the deep chocolate flavor, while a touch of coffee enhances the cocoa’s richness.
It’s the kind of cake that tastes even better the next day.
By following this method, you’ll achieve perfectly moist layers that stay soft for days, with edges that have that signature old-fashioned crunch. The aroma alone will have everyone gathering around the kitchen, and the first bite delivers that satisfying combination of dense chocolate and subtle spice. Ready to bake?
This recipe is designed to be your go-to for birthdays, holidays, or simply treating yourself to a classic dessert. The instructions are straightforward, but the results are anything but ordinary—just like the cakes from your favorite childhood memories. Let’s get started on creating this timeless treat.
Ingredients for old fashioned chocolate cake
Classic ingredients with precise measurements create that signature old-fashioned chocolate cake texture.
| Ingredient | Amount | Notes |
|---|---|---|
| Unsalted Butter 🧈 | 1 ½ cups | Cold, cubed for creaming |
| Granulated Sugar 🍚 | 2 ¼ cups | Superfine preferred for smoothness |
| Light Brown Sugar 🍚 | ¾ cup | Packed firmly for accuracy |
| All-Purpose Flour 🌾 | 2 ½ cups | Sifted, spooned and leveled |
| Unsweetened Cocoa Powder 🍫 | ¾ cup | Dutch-processed for smoothness |
| Baking Powder 🍞 | 1 ½ tsp | Freshly measured for lift |
| Ground Cinnamon 🌿 | 1 ½ tsp | True Ceylon preferred |
| Ground Nutmeg 🌿 | ½ tsp | Freshly grated preferred |
| Instant Espresso Powder ☕ | 1 tbsp | Enhances chocolate depth |
| Salt 🧂 | ½ tsp | Diamond Crystal preferred |
| Large Eggs 🥚 | 4 whole | Room temperature for blending |
| Vanilla Extract 🌸 | 2 tsp | Pure Madagascar bourbon |
| Buttermilk 🥛 | 1 cup | Fresh for optimal tang |
| Hot Water 💧 | ½ cup | Near boiling for activation |
| White Chocolate Chips 🍫 | 1 ½ cups | High-quality for melting |
The butter quality is non-negotiable here—Plugrá or European-style yields superior texture. Costco or Whole Foods carry the best brands, and always buy unsalted for consistent flavor. The cocoa powder should be Dutch-processed for smoothness; Valrhona or Callebaut are industry standards. Brown sugar must be packed firmly to avoid under-measuring. For the spices, Penzeys offers true Ceylon cinnamon and freshly ground nutmeg—worth the investment for authentic flavor. The instant espresso powder enhances the chocolate depth without coffee taste; Starbucks or Nescafé brands work perfectly.
No Dutch-processed cocoa? Natural cocoa powder at half the amount creates a slightly tangier profile. Running short on buttermilk? Mix 1 tablespoon vinegar with 1 cup milk for a perfect substitute. The white chocolate chips can be swapped for chopped white chocolate bar—just ensure it's at least 70% cacao for proper melting. For a richer texture, add 0.25 cup sour cream to the batter. The eggs must be room temperature; cold eggs create dense layers. If you lack vanilla extract, vanilla bean paste works beautifully with the seeds scraped in.
Store the cake in an airtight container with a slice of bread to maintain moisture—3-4 days at room temperature or 1 week refrigerated. For long-term storage, freeze individual layers wrapped in plastic for up to 3 months. The crumb remains tender when stored properly, and the warm spices develop deeper notes over time. Always bring the cake to room temperature before serving to preserve that signature moist texture. The aroma alone will have your kitchen smelling like grandma's kitchen.
Why You'll Love This Recipe
- No Mixer Needed: I swear by this recipe when I’m in a hurry—just cream the butter and sugars by hand (or use a fork in a pinch), fold in the dry ingredients, and you’re done. The cocoa powder and brown sugar do all the heavy lifting for rich flavor without fuss.
- Rich Without Overpowering: That combo of granulated and brown sugar? It’s the secret—sweet but not cloying, with just enough depth from the cocoa. Honestly, the first bite makes me want to skip dessert and eat the whole cake.
- Birthday or Boredom: Between us, this cake is my go-to for any reason—birthdays, potlucks, or just because I crave chocolate. It’s sturdy enough to slice neatly (no crumbly mess) and tastes just as good the next day.
- Budget-Friendly Luxury: You’d never guess how cheap this is to make—just butter, sugar, flour, and cocoa. I’ll be real: it’s the kind of cake that feels special but won’t break the bank, and leftovers? They’re even better with a dusting of powdered sugar.
Step-by-step instructions for old fashioned chocolate cake
Master this classic technique for layers that stay moist for days while developing that signature warm spice crunch.
👨🍳 Step 1: Cream Butter and Sugars to Peak Volume
In a stand mixer fitted with the paddle attachment, beat the 1.5 cups unsalted butter on medium speed until smooth and creamy. Gradually add the 2.25 cups granulated sugar and 0.75 cup light brown sugar, mixing continuously for 5-6 minutes until the mixture is light, fluffy, and nearly doubles in volume. You'll notice the texture transform from thick to airy—this is crucial for tender layers.
I press down on the butter mixture with my fingers at the 3-minute mark to check for proper aeration. The mixture should spring back immediately when pressed, indicating proper incorporation of air. If it feels dense, continue mixing for another minute. This step ensures your cake will have that signature moist crumb that keeps it delicious for days.
👨🍳 Step 2: Incorporate Eggs and Flavorings
Add the 4 whole large eggs, one at a time, mixing on low speed after each addition until fully incorporated. Then add the 2 tsp vanilla extract and 1 tbsp instant espresso powder, mixing just until combined. The espresso powder enhances the chocolate flavor without adding bitterness—this is the secret to that deep, rich chocolate taste.
Here's where it gets technical: I like to add the eggs slowly to prevent curdling. If you notice the mixture looking slightly broken after adding the first egg, don't worry—it will come together when we add the dry ingredients. The key is to maintain a smooth, homogeneous batter at this stage.
👨🍳 Step 3: Combine Dry Ingredients Precisely
In a separate bowl, whisk together the 2.5 cups all-purpose flour, 0.75 cup unsweetened cocoa powder, 1.5 tsp baking powder, 1.5 tsp ground cinnamon, 0.5 tsp ground nutmeg, and 0.5 tsp salt. Sift the dry ingredients directly into the wet mixture, mixing on low speed just until combined—you should still see some flour streaks. Overmixing develops gluten and can make your cake tough.
Add the 1 cup buttermilk and 0.5 cup hot water alternately, beginning and ending with the buttermilk. Mix just until the dry ingredients are moistened. The hot water activates the baking powder for maximum lift, while the buttermilk adds moisture and tang. The batter should be thick but pourable—if it's too stiff, add 1 tablespoon hot water at a time until it reaches the right consistency.
🍳 Step 4: Fold in White Chocolate and Prepare Pans
Gently fold in the 1.5 cups white chocolate chips using a silicone spatula, being careful not to deflate the batter. Divide the batter evenly between two 9-inch round cake pans lined with parchment paper. Tap each pan firmly on the counter to remove any air bubbles and ensure even layers.
Preheat your oven to 350°F while the batter rests for 10 minutes at room temperature. This resting period allows the flour to hydrate fully and the batter to come to room temperature, preventing cracks and promoting even baking. I like to place the pans on the middle rack of my oven—this ensures even heat distribution for perfectly baked layers.
🔥 Step 5: Bake to Perfect Doneness
Bake the cakes for 30-35 minutes, or until a toothpick inserted into the center comes out with a few moist crumbs but no wet batter. The edges should be set while the centers remain slightly springy. Rotate the pans halfway through baking for even browning—this is especially important for cakes with dense batters like this one.
I know it seems counterintuitive, but don't overbake. The cakes will continue cooking as they cool, and overbaking leads to dryness. When the cakes are done, transfer them to a wire rack and let them cool in the pans for 15 minutes before removing. This gradual cooling prevents cracking and helps maintain that moist interior we're after.
Pro Tips For Making Old Fashioned Chocolate Cake
- MELT BUTTER SLOWLY: I learned this the hard way—dumping cold butter into hot liquid and ending up with lumps that ruin the texture. Warm the butter in the microwave for 20 seconds first, then whisk it into the sugars. The goal is a smooth, glossy base, not a greasy mess.
- SIFT THE COCOA: That cocoa powder isn’t fine enough to just measure by volume. Sift it with the flour before mixing—this prevents clumps and ensures even distribution. Trust me, your cake will be denser and richer if you skip the "eyeballing" step.
- BAKE UNTIL SPRINGY: The toothpick test is overrated. Press the center—if it springs back slowly (not instantly) and leaves a few moist crumbs, that’s perfect. Overbaking dries out the cake, and underbaking leaves it gummy. Aim for 25–30 minutes at 350°F, then check.
- ADD AN EXTRA EGG: This isn’t a substitution—it’s an upgrade. The old-fashioned version is denser, so crack in an extra egg (or add 1 tablespoon extra liquid). It makes the crumb finer and the texture more velvety. (Yes, even if the recipe says three.)
Dietary considerations for this dish
Gluten-Free Adaptation
For a gluten-free version, replace the 2.5 cups all-purpose flour with a high-quality blend like King Arthur Measure for Measure or Bob's Red Mill 1:1 Gluten-Free Flour. These blends include xanthan gum for proper structure.
I recommend adding ½ tsp xanthan gum separately if your blend doesn't contain it. The texture will be slightly denser but still moist—expect a 5-10% longer bake time at 350°F. 🌾
Dairy-Free Options
Swap the 1.5 cups unsalted butter for 1.5 cups dairy-free butter like Miyoko's or Earth Balance, both of which mimic butter's fat content perfectly. Replace the 1 cup buttermilk with 1 cup unsweetened almond milk mixed with 1 tbsp lemon juice or vinegar.
For the white chocolate chips, use Enjoy Life brand dairy-free chips—they melt beautifully without compromising texture. The cake will still develop that signature crunch while remaining rich and moist.
Lower Sugar Version
Reduce the 2.25 cups granulated sugar and 0.75 cup brown sugar to 1.5 cups total (split between granulated and brown). Add 2 tbsp monk fruit sweetener or 1 tbsp erythritol to compensate without adding bulk.
I also recommend increasing the 1 tbsp instant espresso powder to 2 tbsp to enhance chocolate flavor. The cake will be less sweet but still rich—perfect for those watching sugar intake while enjoying chocolate's depth. 🍫
Nut-Free Considerations
If avoiding nuts entirely, omit the white chocolate chips and replace them with 1.5 cups dairy-free chocolate chips (like Enjoy Life brand) or 1 cup mini marshmallows for a lighter texture. For extra moisture, add ½ cup applesauce to the batter.
The marshmallows will create pockets of softness while keeping the cake nut-free. Always check labels on all ingredients to ensure no cross-contamination with nut facilities.
Allergen-Friendly Tips
For egg-free baking, use 4 large flax eggs (4 tbsp ground flaxseed + 10 tbsp water, mixed and rested for 5 minutes) or JUST Egg substitute. For soy-free, ensure your chocolate chips and butter are soy-free—Pascha brand chocolate chips work well.
When using substitutes, reduce baking time by 2-3 minutes and check for doneness at 28 minutes since egg substitutes can accelerate browning. Always taste-test your substitutes first in small batches to ensure proper texture.
Nutrition facts
Frequently asked questions
Why does this cake need both granulated and brown sugar?
The combination creates the perfect balance: granulated sugar dissolves quickly for smoothness, while brown sugar adds moisture and that signature caramelized crunch at the edges. The molasses in brown sugar also enhances the warm spice flavors, making each bite more complex.
Can I make this cake in a single layer instead of two?
Yes! Use a 10-inch tube pan or 9x13-inch baking dish for a single layer. Reduce baking time by 5-7 minutes and check for doneness at 25 minutes—the center should spring back slightly when pressed. The texture will be denser but still moist.
What's the purpose of the hot water in the batter?
The ½ cup hot water activates the baking powder for maximum lift while also helping to dissolve the sugars more evenly. It creates tiny steam pockets that contribute to the cake's signature tender crumb. Think of it as a secret ingredient for that old-fashioned lightness!
My cake cracked on top—what went wrong?
Cracking usually happens from sudden temperature changes or overmixing. Let the batter rest for 10-15 minutes before baking, and avoid opening the oven door during the first 20 minutes. Also, ensure your eggs and butter are at room temperature. For next time, try brushing warm water on the cracks before frosting—they'll disappear!
How do I store leftovers to keep them moist?
Wrap the cake tightly in plastic wrap, then place it in an airtight container with a slice of bread to absorb excess moisture. Store at room temperature for 3-4 days or refrigerate for 1 week. For longer storage, freeze individual layers wrapped in plastic for up to 3 months. Always bring it to room temperature before serving.